

SVX-Link as Echolink
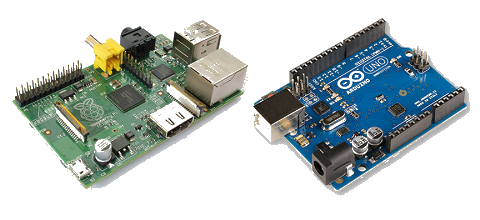
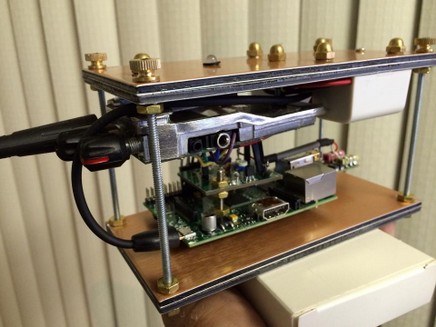
SVX-Link on a Raspbery PI
This is an amateur radio transceiver wired into a Raspberry Pi and loaded with Echolink software (SVXLINK). One can use this with a 12V battery and connect to the echolink network. Here is the method i used and worked well for me.
Installation instruction for Raspbian
PLEASE NOTE: THIS INSTRUCTION WILL NEED UPDATES FOR THE LATEST RASPBIAN RELEASE
These instructions explain how to install SvxLink on a Raspberry Pi, with pre-compiled packages from the official Raspbian software repository. It does not cover all parts of the installation and configuration in detail, but it should be easy to understand, even for someone with limited Linux knowledge and experience.
Note: Please browse through the instruction quickly, before you begin.
Download and install image
Download the image, Raspbian Stretch: https://www.raspberrypi.org/downloads/raspbian/
Details: The official Raspbian installation instruction can be found here. https://www.raspberrypi.org/documentation/installation/installing-images/README.md
Download the image installation program "Etcher" and install the image on the card: https://etcher.io/
Before inserting the SD-card in the RaspberryPI, enable ssh. Add a file named "ssh" in the root of the SD-card. https://www.raspberrypi.org/documentation/remote-access/ssh/
Insert the SD-card and boot the Raspberry. The Raspberry PI will start with DHCP enabled (automatically request an ip-address from your local router). Find the ip-address of the raspberry pi, and logon. Details: https://www.raspberrypi.org/documentation/remote-access/ip-address.md
Login and password
If you have a monitor and keyboard connected to your Raspberry, just logon at the prompt after it has started. You can also connect via ssh, without a monitor and keyboard connected. Good tools for SSH on Windows are: Putty or MobaXterm
username: pi
password: raspberry
Change the default password "raspberry" to something else, the command passwd will change the password:
passwd
Set static ip-address
Optionally set a static ip address by editing the dhcpcd.conf file. See the example in the bottom of the file. You can use "nano" editor. To save and exit the editor, press ctrl-x and answer Y to save:
sudo nano /etc/dhcpcd.conf
# Example static IP configuration:
interface eth0
static ip_address=192.168.0.10/24
#static ip6_address=fd51:42f8:caae:d92e::ff/64
static routers=192.168.0.1
static domain_name_servers=192.168.0.1 8.8.8.8
Now is a good time to reboot your Raspberry.
sudo reboot
If you can not reconnect to the new static ip address, something is wrong. Try power off/on, or connect a monitor.
Install SvxLink
The current version of the SvxLink packages for Raspbian is called 17.12.1-2. The packages is not available directly in in the Raspbian Stretch image, but in the "testing" software repository (Buster release). To install this release, we temporarily add the Buster software repository and install SvxLink.
echo 'deb http://mirrordirector.raspbian.org/raspbian/ buster main' | sudo tee /etc/apt/sources.list.d/svxlink.list
sudo apt-get update
Note: Do NOT upgrade your complete system. We only want the SvxLink applications from the "buster" release!
Now install the svxlink-server package. The apt-get command will automatically select other packages needed for SvxLink to run.
sudo apt-get -t buster install svxlink-server
Now remove the buster repository again.
sudo rm /etc/apt/sources.list.d/svxlink.list
Install SvxLink sounds
Next install the English sounds for SvxLink with the following commands.
cd /usr/share/svxlink/sounds/
sudo wget https://github.com/sm0svx/svxlink-sounds-en_US-heather/releases/download/14.08/svxlink-sounds-en_US-heather-16k-13.12.tar.bz2
sudo tar xvjf svxlink-sounds-en_US-heather-16k-13.12.tar.bz2
sudo ln -s en_US-heather-16k en_US
Configuration
Next we Set the station s Echolink Username and password
sudo nano /etc/svxlink/svxlink.d/ModuleEchoLink.conf
SERVERS=servers.echolink.org
Note: -R for repeater and –L Link “ Callsign-R
CALLSIGN=USERNAME
PASSWORD=Password
Ctrl + X , Y , enter “ Save and exit “
Next We Set the serial Port pins and Audio Device but we need to find our devices
Start with Serial Port
python -m serial.tools.list_ports
/dev/ttyAMA0
/dev/ttyUSB0 ------ Thit is the one we and looking for “ note “
2 ports found
Next is to set the Audio device ..
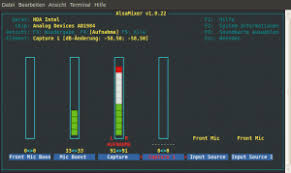
sudo alsamixer
F6 - so select your Device , Im using a CM108 USB
F5 - to show all options
Set the audio levels to approximately 75 % on all options
Esc to exit
Then Save these setting
suso alsactl store
Now we can configer the SVXLink Change the Tags in RED
sudo nano /etc/svxlink/svxlink.conf
[GLOBAL]
LOGICS=SimplexLogic
#,ModuleTclVoiceMail,MetarInfo
CALLSIGN=********
RGR_SOUND_DELAY=-1
REPORT_CTCSS=88.5
CALLSIGN=*********
REPORT_CTCSS=88.5
[Rx1]
AUDIO_DEV=alsa:plughw:1
AUDIO_CHANNEL=0
SQL_DET=SERIAL
CTCSS_FQ=88.5
SERIAL_PORT=/dev/ttyUSB0
SERIAL_PIN=DSR
[Tx1]
AUDIO_DEV=alsa:plughw:1
AUDIO_CHANNEL=0
PTT_TYPE=SerialPin
PTT_PORT=/dev/ttyUSB0
PTT_PIN=DTRRTS
#######################################################
Ctrl + X , Y , enter to exit and save
sudo svxlink to run SVXLINK to QUIT Press Q
Once all the setting have been done and you happy them put it to auto start on boot
sudo nano /etc/rc.local
Just above the line ‘exit 0’ add the following lines to read as follows
HOME=/home/pi
export HOME
/usr/bin/svxlink –daemon
exit 0
Ctrl + X , Y , enter to exit and save
Reboot, and all should be working
If you wish to add your SVX system on APRS \ Echo link location map
Use following settings
[GLOBAL]
LOCATION_INFO=LocationInfo
and configure module:
[LocationInfo]
APRS_SERVER_LIST=rotate.aprs2.net:14580
STATUS_SERVER_LIST=aprs.echolink.org:5199
#
LON_POSITION=85.37.12W
LAT_POSITION=44.45.36N
# EL is for link ER is for repeater
CALLSIGN=EL-CALLSIGN
FREQUENCY=146.860
#
TX_POWER=5
ANTENNA_GAIN=0
ANTENNA_HEIGHT=106m
ANTENNA_DIR=-1
PATH=WIDE1-1
BEACON_INTERVAL=10
COMMENT=SvxLink EchoLink Traverse City, Michigan
Compiled By: ZR6DLG David
ZR6LSD Dave